Deploy NestJS API to Linux App Service on Azure


I recently created a very simple API using NestJS, and came across some issues while deploying it to a Linux App Service in Azure. Being new to NestJS, there were a few things I didn't realize you had to do, so I'm going to go over the whole process step by step.
Disclaimer
I am not a NestJS expert. In my day job we use .Net for our APIs, so I built a simple API using NestJS just to see how I liked it since I heard it was an easy framework to use if you're an Angular developer. I am not 100% sure this is the best way to do a build and deploy, but it has been working for me.
Assumptions
This article assumes you are a little familiar with NestJS and the hosting and build processes on Azure. It also assumes you have a NestJS app built using the NestCLI.
I will be deploying this to a Linux app service running Node 10. If you are using a Windows service it may be a little different.
For this demo I am using a brand new NestJS app set up from the CLI.
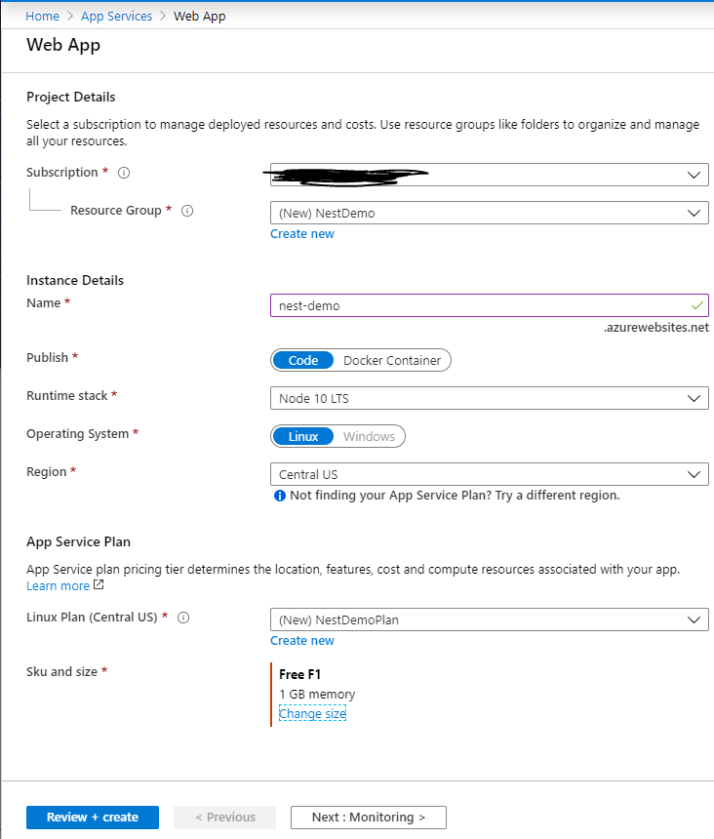
App Service Setup
First let's set up the App Service in Azure. I am using a Linux OS, running Node 10, and using the 'free' size:
Build & Deploy Setup
Head over to the Azure Dev Ops portal and in your project, click on Pipelines on the left nav bar, and then create a new pipeline.
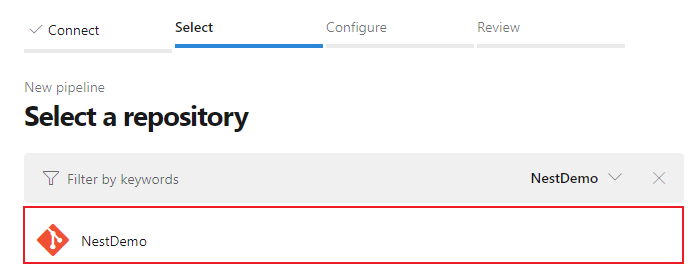
The first thing it asks you is where your code is hosted. I have mine hosted in Azure, so I'll select the Azure Repos Git.

Then I'll select my repo. Mine is called Nest Demo.
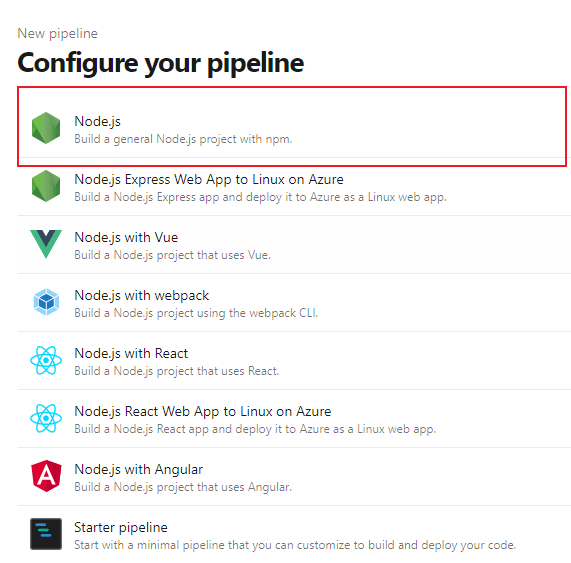
Next it will ask you to select the type of pipeline you are going to be setting up. Basically this is going to give you a template to build off of. I used the Node.js pipeline.
Adjust the Pipeline
From here on out is where I got a little stuck the first few times I tested this out. Coming from Angular, I was used to the build bundling everything up so it was completely ready to deploy to the server. That isn't the case with a NestJS app. It will build the code, which transpiles the typescript to javascript, but it doesn't bundle all your dependencies from node_modules.
So in order for it to work you need to also deploy the node_modules to the app service. I wanted everything to be in a single folder, so this is how I did it:
- Run npm ci and npm run build
- Copy the package.json and package-lock.json to the dist folder created from the build.
- From the dist folder run npm ci –production
- Zip up the dist folder
- Publish the dist as an artifact for a Release
This gets only the essentials that we need into our dist folder, so that it is a smaller folder to copy to the app service. A little more on why I think this is important later.
One important note on step 2 is that I'm copying both the package.json and package-lock.json. If you don't have the package.json in the dist folder, the npm ci will go up a folder and still build the node_modules in the root, because that's where the package.json file lives.
Here is the new YAML file after adding the new changes
Go ahead and run that pipeline, which outputs our dist.zip folder as an artifact. Now we can set up a release to actually deploy it to our app service.
Release Setup
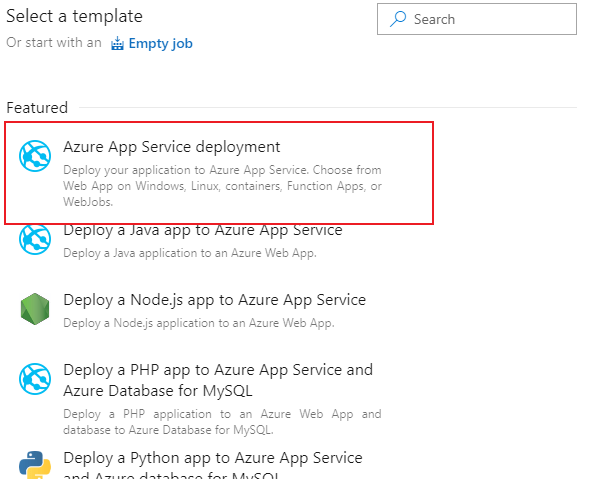
Go to Releases on the left nav under Pipelines and create a new release pipeline. It will ask you to select a template. I used the Azure App Service Deployment option.
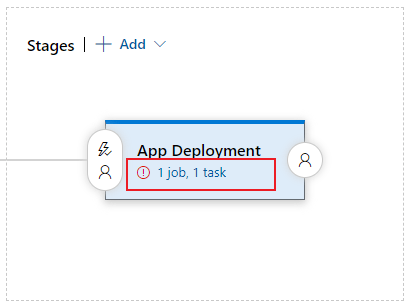
It will then give you a little window to set the Stage name and owner properties. Adjust as needed, I renamed my stage to App Deployment.
Then on the middle of the screen in the Stages section, click on the stage we just created. It should say 1 job, 1 task. You want to click the 1 job, 1 task link so we can set that up.
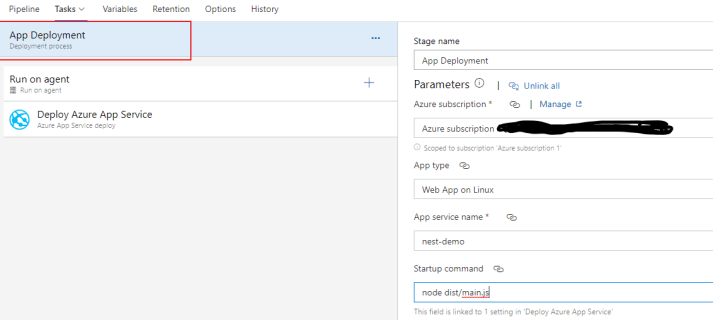
Now edit the Stage parameters to select the subscription, app type, and service name. Be sure to set the App type to Linux. I set the Startup command to be node dist/main.js.
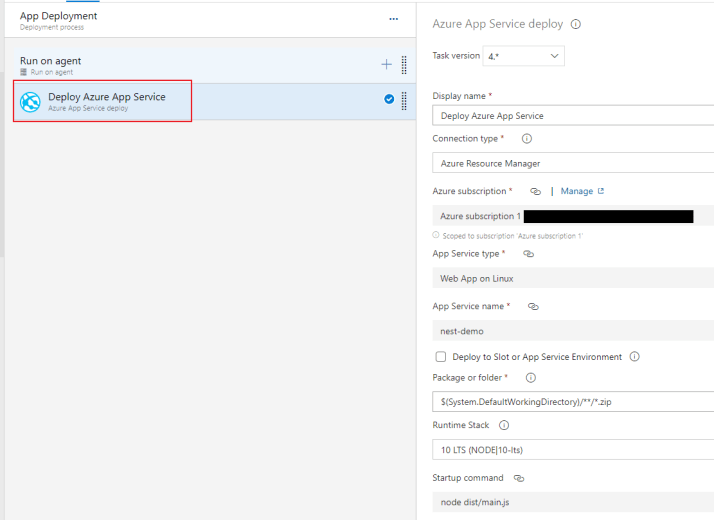
Then select the Deploy Azure App Service task to edit it. Since we added the properties to the stage above, this will mostly be filled out. Just select the Runtime Stack to match your app service, in my case it's Node 10. If you want you can change the Package or Folder to grab the exact zip file by name, but leaving it as the default works, it will grab the only zip in our artifact, dist.zip.
The last, crucial step is to select the artifact to use for this release. Go back to the Release Pipeline and click Add an artifact.
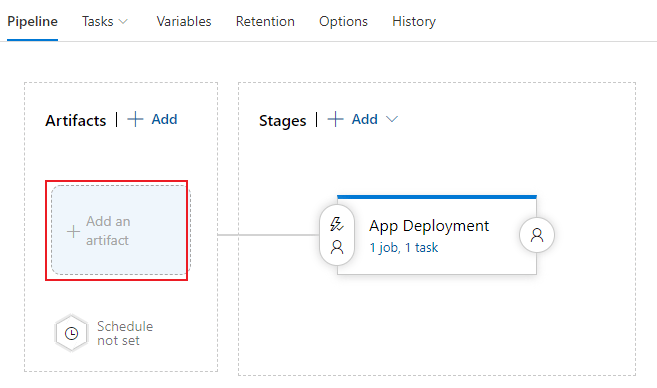
Source type should be Build. Then select the Project and Source. In my case both are called NestDemo. Change any other properties as you desire, and Add it. Save this Pipeline.
One other thing I like to add is to set this up to release automatically any time there is a new build available. This is very easy in Azure. Go to the Pipeline, and on the Artifacts section, click the lightning bolt next to your artifact, and then turn on the Continuous deployment trigger.

Running the Release
One very important step before we release is to change the default listening port in our NestJS project. Azure listens on port 8080 by default, so in your main.ts, add this wherever you set your default port:
process.env.PORT || 3000
This means, use process.env.PORT if it exists, if not use port 3000. Azure will set the environment port to 8080, so it will choose that first.
Make the above change if you need to, commit, and push. If you set up the CI/CD triggers above, the push will automatically start the build and deploy process for you. If not, kick it off manually.
Assuming everything went correctly, it should be working. Navigate to your site and make sure it's up and running.
One down side to doing it this way, is that when you app gets bigger, and you add more dependencies to your package.json, the node_modules gets bigger, and the deploy takes longer. This is why I mentioned above to do the npm ci –production in the dist folder to only get the essentials. If you know if a better way to get the npm dependencies downloaded, let me know! Comment below or tweet me.
Troubleshooting Tips
If for any reason your app isn't working, here are a few things to check and some tips.
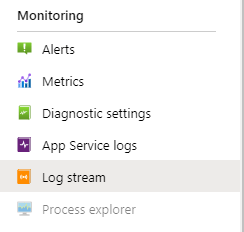
First check the Log Stream for anything that stands out as an issue. This can be found in the azure portal under Monitoring.
You can use the Kudu portal to check on various details of your site. It can be found by navigating to the url: your-site-name.scm.azurewebsites.net, notice the scm after the site name. From here one thing I found very useful was to browse the wwwroot directory to ensure all the files are deployed like I thought, and in the correct folder structure.
One last thing to check is that the startup command is correct. This is the command Azure runs to start your app. This is set as a property during the release pipeline setup, but can also be changed in the Azure Portal under Settings->Configuration->General Settings and then Startup Command.
Summary
Hope this helped you set up your NestJS app on Azure!