Run a Postgres Database for Free on Google Cloud


There are a few ways that you can run a Postgres database in Google Cloud. My favorite is using Cloud SQL, but even the smallest database option costs money. If you want a free option for running Postgres, the only option that I’m aware of is using a VM that falls into the Free Tier, which is an e2-micro.
I’ll show you how to run a Postgres database for free on Google Cloud running it in Docker on Compute Engine. This is a very small vm, and is only a good setup for development or proof-of-concept projects.
Watch the video if you prefer. Run a Postgres Database for Free on Google Cloud!
Network Setup
Before creating the VM, we need to prep one thing on our firewall. Since Postgres uses TCP port 5432, we need to tell the firewall to allow traffic on that port.
In the Google Cloud Console, be sure to select your Project, then go to VPC Network, and then choose the Firewall option on the left menu.
- On the top of the page, click Create Firewall Rule.
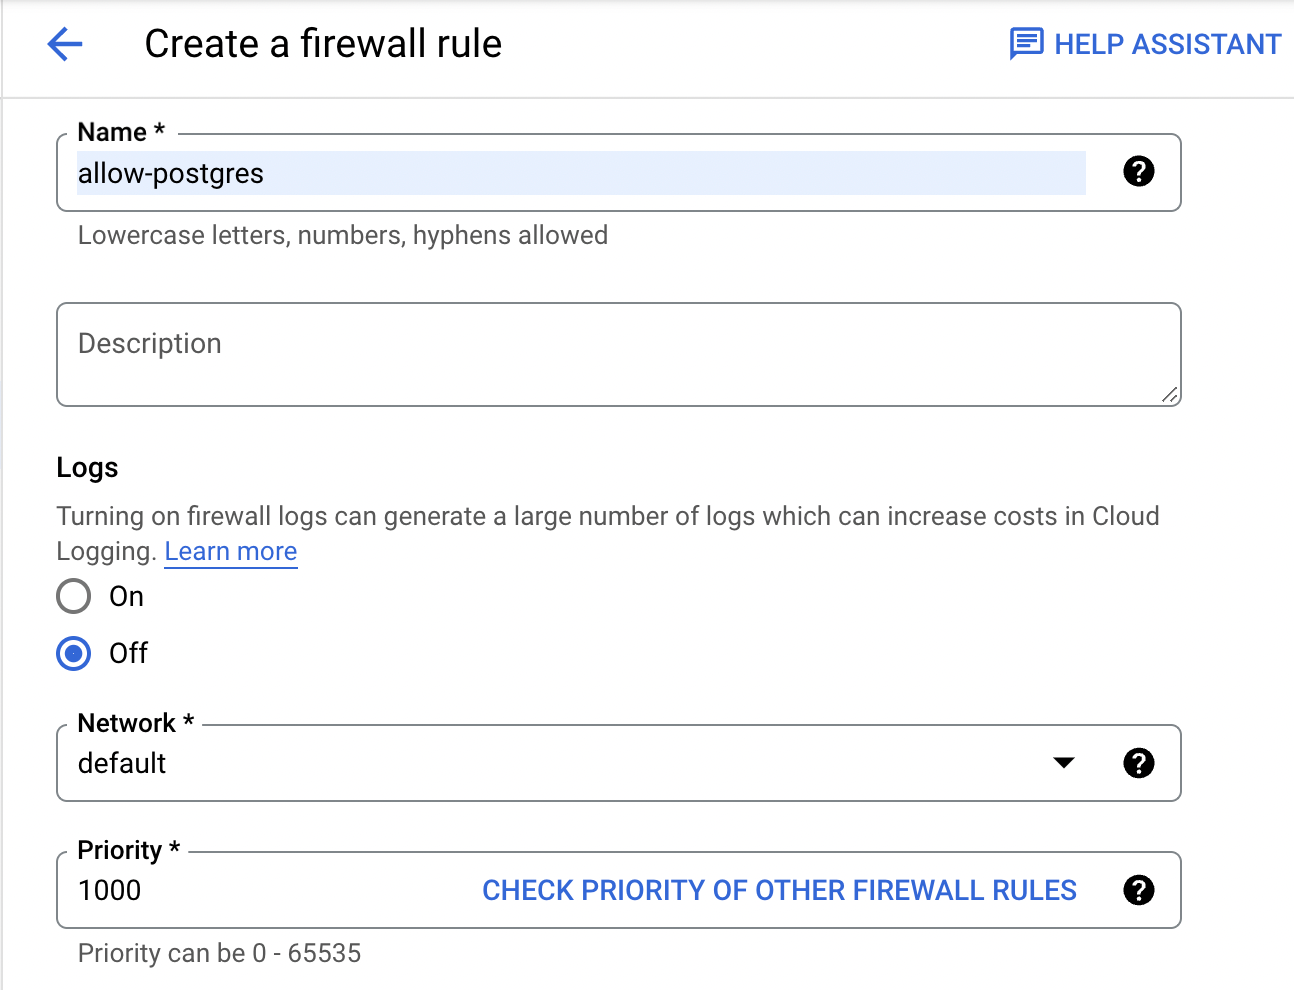
- Give your rule a name, I’m calling mine
allow-postgres. - Choose the network. This will be
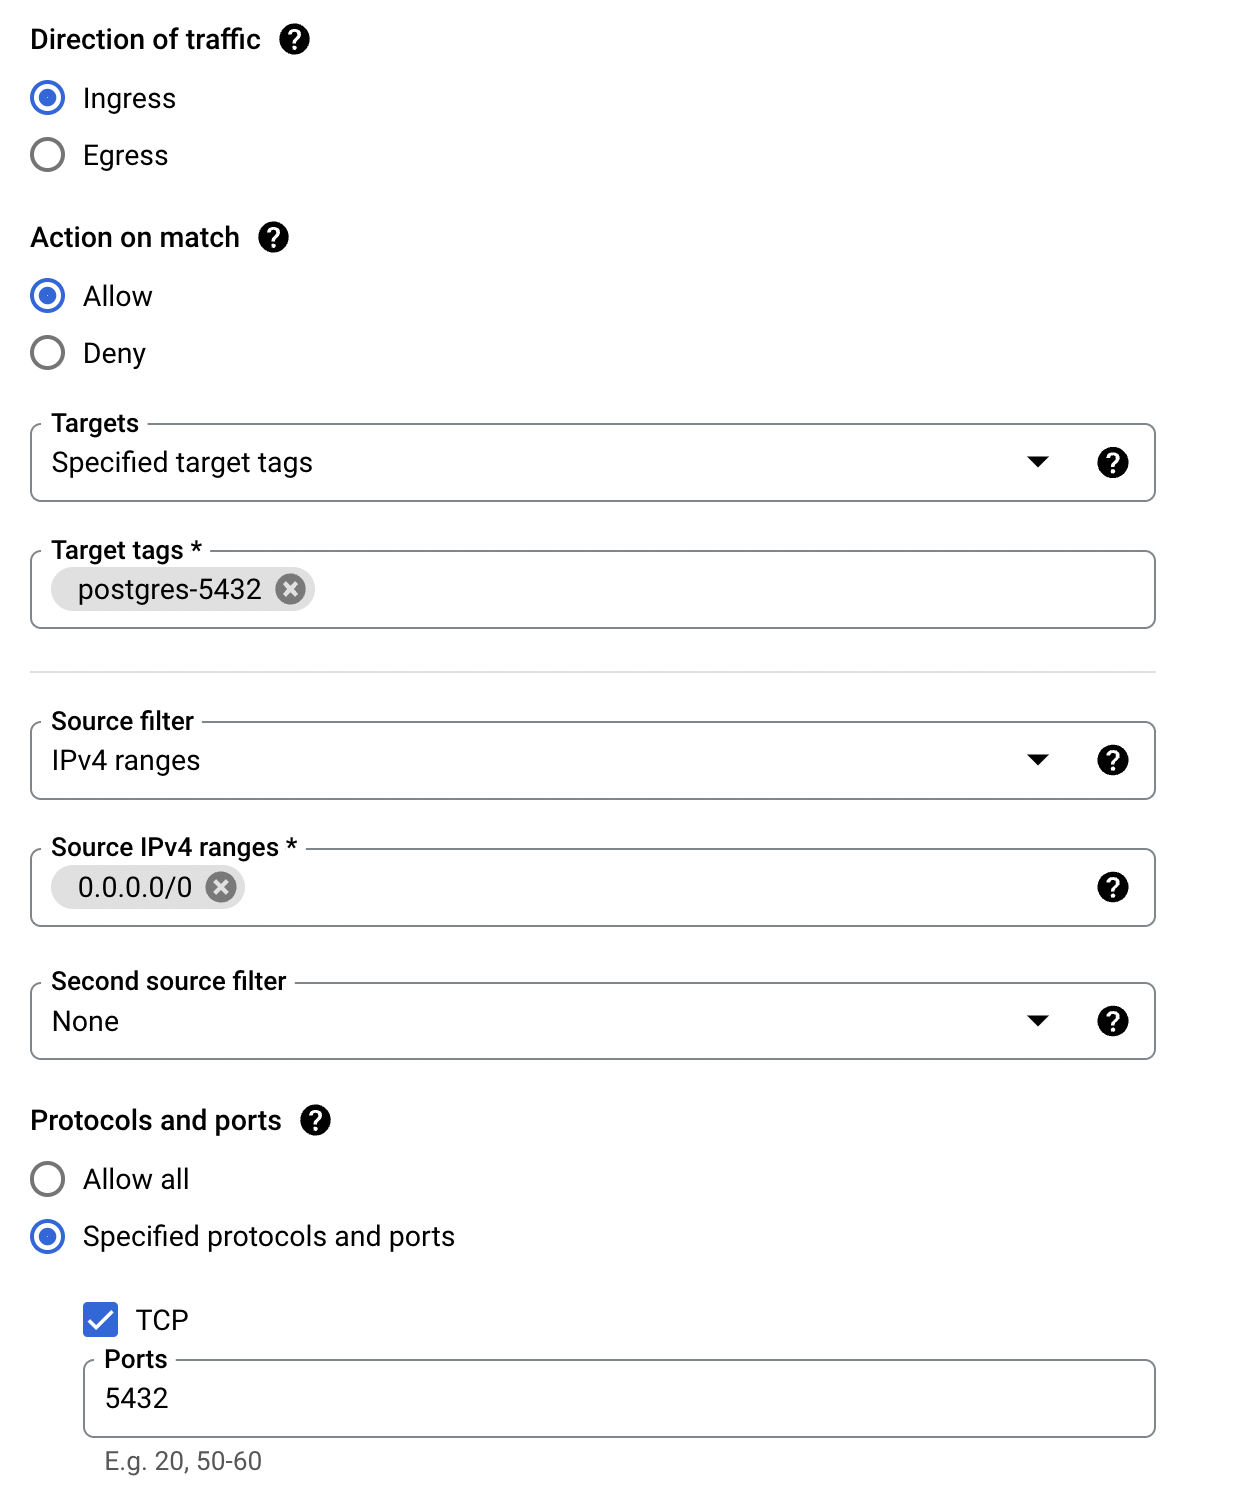
defaultunless you have created a new network. - Direction of Traffic should be Ingress.
- Action on Match should be Allow.
- For Targets, I’m leaving it as Specified target tags, and in Target Tags I’m calling it
postgres-5432.- Using tags means we have to add this tag to each instance we want to apply this rule to. We will do this when setting up our VM.
- In Source IPv4 ranges, add 0.0.0.0/0. This means we will allow any IP to connect.
- If you wanted to restrict this to a specific IP, or a range of IP’s, you should put them here instead of all 0s.
- Under
Protocols and ports, checkSpecified protocols and ports, then check TCP, and enter 5432. - Click Create.
 Our network is now all configured and we can now create the VM.
VM Setup
Let’s set up our virtual machine. In the Google Cloud console, go to Compute Engine. At the top of the page, click the Create Instance button. If you want to keep this free, it’s very important to pay attention to how this instance is set up. Here are the current requirements to be free. I’m writing this up using the current requirements. Please check the link in case any of this changes.
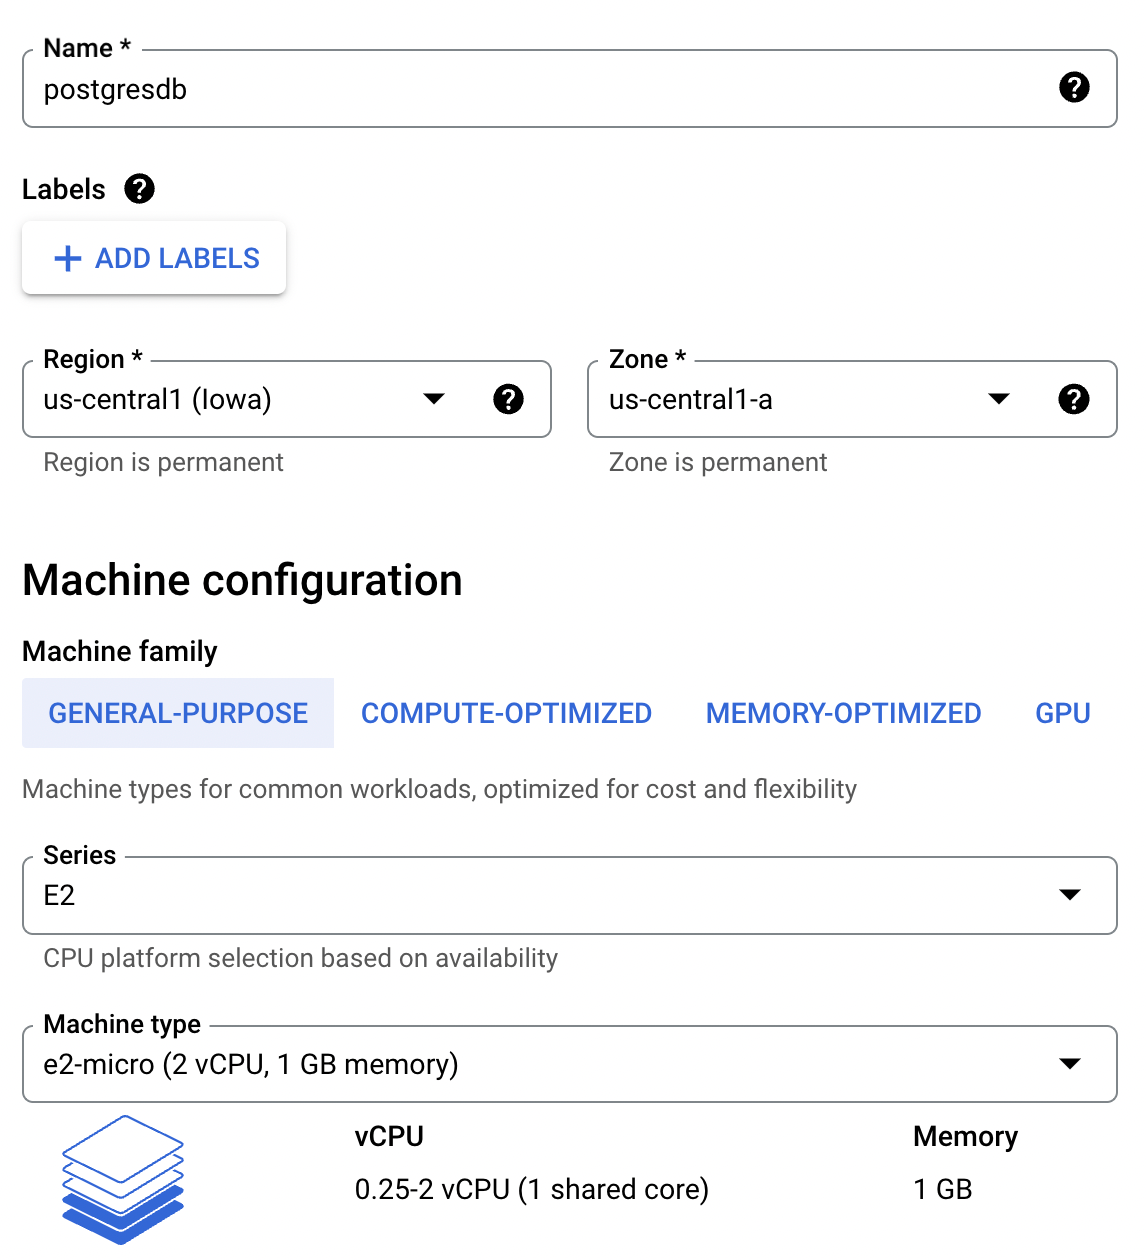
- Give your vm a name.
- Choose a region. Be sure to choose one that fits the free tier requirement and is geographically close to you.
- For series, choose E2, and Machine Type must be changed to e2-micro.
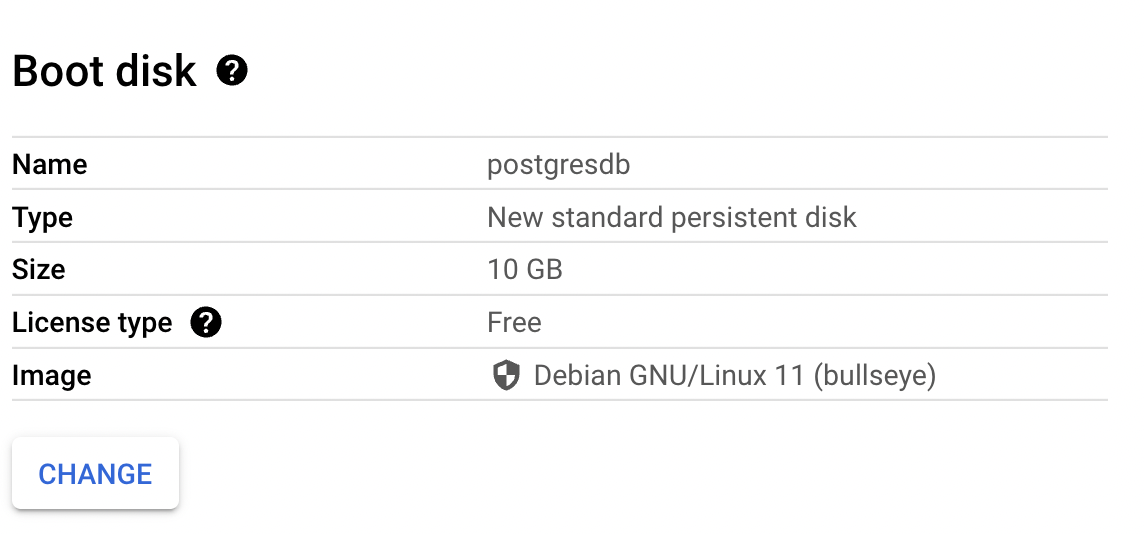
- Under Boot disk there is an important setting to change to fall under the Free Tier. Click Change, and change the Boot disk type to Standard persistent disk.
- The Size must be less than 30GB.
- I’m leaving the OS as Debian, but that can be changed here if you wish.
- Click Select to go back to the main creation page.
- The last thing to change is under Advanced Options, and expand Networking. In the Network Tags box, enter the name of the tag created in the VPC above. Mine is
postgres-5432.
That’s all we have to do. Click Create to build the image. One important note is that it may show this VM costing you some money. That is because you get 1 month of this sized image for free. GCP will not check if you have others running, so you have to be aware of what you have running. However if you create it with the criteria matching their free tier you should be all set. Check your billing page after a few hours to make sure it’s not accruing charges.
Docker Setup
I’m going to run Postgres inside Docker. You don’t have to, you could install it manually and run it, but I’m a fan of using Docker. There are a few steps needed to set up Docker Engine on our VM, but it’s pretty straight forward, and the Docker documentation has the exact steps to follow. Let’s start with their instructions. I left the VM as the default OS, Debian, so I’m using their Debian documentation. First, go to your list of VM Instances, and click the SSH button to connect to the server. Once connected we can install Docker Engine.
First we need to set up the repository.
First we run sudo apt-get update.
Then run:
sudo apt-get install \
    ca-certificates \
    curl \
    gnupg \
    lsb-release
Then:
sudo mkdir -p /etc/apt/keyrings
curl -fsSL https://download.docker.com/linux/debian/gpg | sudo gpg --dearmor -o /etc/apt/keyrings/docker.gpg
And then:
echo \
  "deb [arch=$(dpkg --print-architecture) signed-by=/etc/apt/keyrings/docker.gpg] https://download.docker.com/linux/debian \
  $(lsb_release -cs) stable" | sudo tee /etc/apt/sources.list.d/docker.list > /dev/null
Now that apt knows how to install it, we can actually do the install.
First run sudo apt-get update
Then run:
sudo apt-get install docker-ce docker-ce-cli containerd.io docker-compose-plugin
That’s all you should need to do, and it should be installed. You can verify it by running:
sudo docker run hello-world
If Docker is installed correctly, you should see a message that says: “Hello from Docker! This message shows that your installation appears to be working successfully.”
Now we can run Postgres.
Docker Run Postgres
We’re now all set to pull the Postgres docker image and run it. Information and documentation can be found from the official Postgres Docker Hub page.
All of these commands are in the same SSH window from the previous steps.
I have another blog post just about running Postgres in Docker, you can check it out here if you’d like.
To use the latest version of Postgres, use this pull command: sudo docker pull postgres
Once that is completed, run the image using the following command:
sudo docker run --name some-postgres -e POSTGRES_PASSWORD=BestPasswordEver -v postgres:/var/lib/postgresql/data -p 5432:5432 -d postgres
There are a few important parameters we are passing here.
The first is an environment variable (-e) for POSTGRES_PASSWORD. This is the password you will use to log in to the database.
The second is a volume (-v). Postgres by default stores all of the database files and data in the folder /var/lib/postgresql/data. By mapping a volume to that folder, it’s telling docker to instead use a location in the host (our VM) to store that data. This is important because if the container gets removed the data won’t be lost. Above I am using a Named Volume called postgres. The other option is a Bind Mount, which you would instead give it an actual path to a folder on your host, such as: -v /some/host/folder:/var/lib/postgresql/data.
The third important parameter is a port mapping (-p) of 5432:5432. Postgres by default uses port 5432, so this is telling our host that it should forward any traffic on port 5432 into our container on the same port.
Use the Database!
That’s all you have to do. You can now log in to your database and begin using it. The server or hostname for your connection is the External IP address of your VM. This can be found in the Instance list under Compute Engine in GCP’s Console. The user is postgres, and the password is the one you supplied in the docker run command above.